

Make-up is an art in its own right. An art that makeup artists shape and reinvent every day. Like a painter, a makeup artist must use the right tools. Here are all our tips to help you choose the right brushes for a perfect complexion.
First of all, remember to carefully clean and moisturize your skin before applying your makeup.
Step 1: foundation
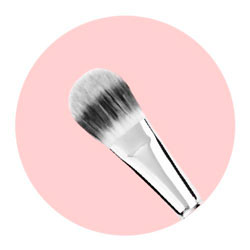
Start by applying foundation to even out your skin tone. For light coverage, use a flat foundation brush, which, thanks to its shape and suppleness, will allow you to smooth and unify your complexion in a natural way. Use the brush with the flat side against the face, in wide outward strokes s from the inside of the face (T-zone) to the outside.
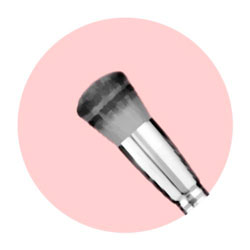
For fuller coverage, prefer a round and dense foundation brush. Thanks to its shape designed to capture more product, this type of brush will allow you to apply thicker, more covering textures, in greater quantity.
To apply foundation with this brush, use circular motions over the desired area.
Step 2: concealer
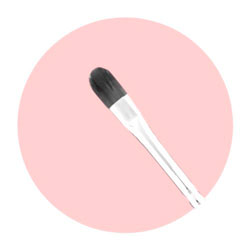
To cover blemishes and dark circles, especially in the delicate area around the eyes, use a concealer brush to precisely apply a concealer or foundation. A concealer brush can be flat or round, tapered into a dome and available in a variety of sizes.
A flat concealer brush will allow for a foundation-like application of the material, while the round curved brush will allow you to target more complex areas, such as the inner corner of the eye or the nasolabial folds.
In terms of size, a larger brush will allow for more blurred application, and better blending of the concealer with the foundation. A smaller brush on the other handwill allow a blemish or specific area to be treated with precision.
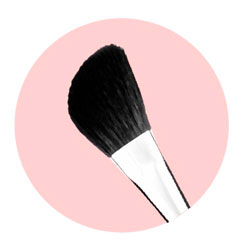

Step 3: blush and contours
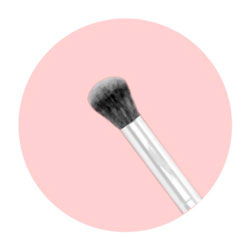
The natural contours and shadows of the face can be worked with a blush brush. Used to apply both bronzer and blush, this brush will help you give your complexion a healthy glow while structuring your skin tone.
There are 2 main shapes of blush brushes: the flat shaped and the slanted one. The flat blush brush will be ideal to apply blush directly on the apples of your cheeks. The slanted blush brush will be more often used to apply bronzer while following the contours of the face, such as the hollow of the cheeks. Indeed, thanks to its more open and airy shape, it allows a more diffuse and homogeneous application of the product in order to avoid too pronounced marks.
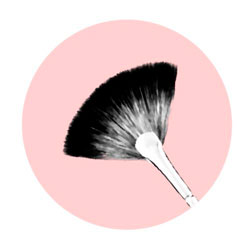
Step 4: highlighter
Be sure to use a highlighter on the tops of the cheekbones, the tip of the nose or the Cupid’s bow to bring light to your complexion. A fan brush will allow you to apply the product lightly to these specific areas of the face. It will also allow you to sweep away excess powder or shadows.

Step 5: setting powder
Don’t forget to apply powder with a powder brush, ideal for loose or pressed powders. The wide and dense shape of this brush will give you a delicate and even finish while keeping your makeup in place all day. Use it by making wide, ample gestures all over the face, in order to obtain flawless coverage.
To find our brushes, click here: https://www.raphael-makeup-brushes.com/en/products/